How to Build an RDA Coil Safely and Cleanly
A freshly built RDA can turn a familiar e-liquid into something far more defined, but only when the coil is installed, checked and wicked properly. Learning how to build an rda coil is less about chasing the lowest resistance and more about creating an even, stable build that suits your mod, batteries and preferred vaping style.
For most adult vapers, a simple single or dual round-wire build on a regulated mod is the right place to start. It is easier to fit, easier to troubleshoot and offers a reliable balance of flavour, vapour and battery life. Save mechanical mods, complex coils and very low-resistance builds for when you fully understand battery safety and Ohm's law.
What You Need to Build an RDA Coil
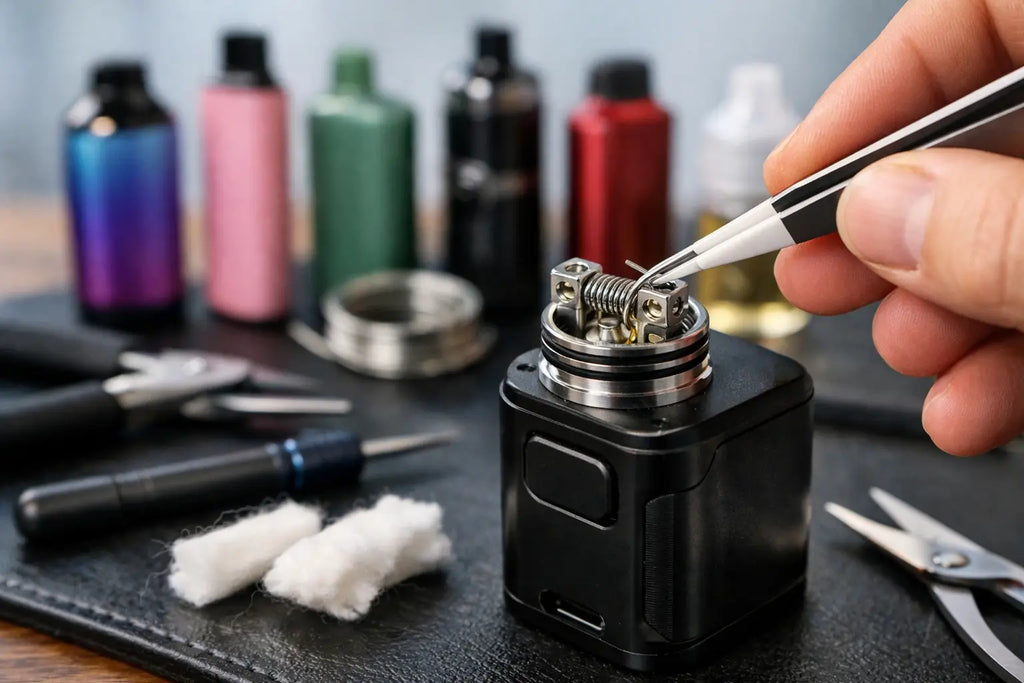
Have everything ready before you remove the RDA cap. You will need a rebuildable dripping atomiser, suitable resistance wire, organic vaping cotton, a coil jig or screwdriver, wire cutters, ceramic tweezers and a small screwdriver that fits your deck screws. An ohm reader is strongly recommended, although a regulated mod with an accurate resistance reading can be used for checking a completed build.
Kanthal A1 is a sensible first wire because it is straightforward to work with in wattage mode. Ni80 heats up faster and is popular for responsive flavour builds, while stainless steel can be used in wattage or temperature control mode if your device supports it. Do not use nickel or titanium unless you understand temperature control and have a compatible mod.
For a first build, 26AWG Kanthal or Ni80 with a 3mm inner diameter is a practical starting point. The exact number of wraps depends on whether you are building single or dual coil, the wire material and the target resistance. Always use a reputable coil calculator to plan the build before cutting wire.
Choose a Safe Resistance for Your Setup
Resistance is not a number to copy blindly from a video or another vaper's build. A dual-coil RDA halves the total resistance compared with one identical coil. For example, two 0.6-ohm coils installed together produce a final resistance of roughly 0.3 ohms.
On a regulated mod, many RDA users begin around 0.3 to 0.6 ohms, then adjust wattage gradually to suit the coil and airflow. This range is not a rule, but it gives many mainstream regulated devices enough room to operate safely without placing unnecessary strain on the batteries.
Use authentic, undamaged high-drain batteries from recognised manufacturers, and check that your mod is designed for the power you intend to use. Never use a torn battery wrap, a damaged cell or a battery that becomes unusually hot. If you are using a mechanical mod, stop here unless you can calculate current draw accurately, inspect your batteries and understand the limits of your specific cells. A regulated device is the safer learning platform.
How to Build an RDA Coil Step by Step
Start by cutting a length of wire with enough spare room to hold while wrapping. Position the wire on your 3mm coil jig and make neat, touching wraps. Keep light tension on the wire so the wraps sit evenly beside one another rather than overlapping. Six to eight wraps is often a useful starting point with 26AWG wire, but use your calculator result rather than relying on a generic wrap count.
Leave the legs pointing in the direction that suits your RDA deck. Some decks need both legs facing the same way, while postless decks often need legs trimmed to an exact length before fitting. Check the deck layout first. A coil that is wrapped perfectly but cut too short is difficult to rescue.
Install the coil without trapping the wire
Loosen the post screws enough to slide the coil legs into place. Insert the legs, centre the coil over the airflow and tighten the screws firmly without overtightening. Overtightening can cut soft wire and cause an unstable connection.
The coil should sit close enough to receive airflow directly underneath or from the side, depending on the RDA design, but it must not touch the deck, posts or top cap. Leave enough clearance for the cotton to pass through and for the cap to fit comfortably.
For a dual-coil build, install the second coil at the same height and position. Matching coil placement matters. If one coil sits higher or closer to the airflow than the other, the RDA may heat unevenly and the flavour can feel unbalanced.
Check resistance before firing
Place the RDA on an ohm reader or regulated mod and check the resistance. Compare it with your planned result. A small difference is normal, but a major change can indicate a loose screw, a clipped leg touching the deck or an incorrect coil configuration.
If the device shows a short, no atomiser message or resistance that jumps around, do not fire the coil. Remove the RDA and inspect every contact point. Check for wire touching the deck, excess leg length under the screws and loose post screws. Resolve the issue before continuing.
Dry Fire and Remove Hot Spots
Once the resistance is stable, pulse the coil at low wattage. Do not hold the fire button down for long periods. Short pulses let you see how the coil heats without overheating the wire.
A correctly prepared coil should glow evenly from the centre outward. If one section glows brighter, gently strum the coil with ceramic tweezers or lightly squeeze the wraps together while the coil is cool or only lightly pulsed. Never use metal tweezers on a firing coil, as this can create a short.
Repeat short pulses and adjustments until both coils heat evenly. Let them cool fully before adding cotton. This stage is where a clean build becomes a dependable one, so do not rush it.
Wick Your RDA for Flavour and Leak Control
Cut a strip of cotton and roll one end into a narrow point. Feed it through the coil with a gentle twisting motion. The cotton should move through with slight resistance. If it drags hard and distorts the coil, use less cotton. If it slides through freely with no contact, use more.
Trim the cotton tails so they can reach the juice well without being tightly packed underneath the coil. Fluff the ends slightly, then place them into the well with tweezers. The aim is to cover the e-liquid feed area while leaving enough space for liquid to travel through the cotton.
Too little cotton can lead to flooding, spitback and leaks. Too much cotton can choke e-liquid flow and cause dry hits, especially with thicker shortfill e-liquids. If your RDA uses deep wells and bottom airflow, avoid stuffing cotton tightly into every gap. Cotton needs room to absorb liquid.
Prime the wick thoroughly with e-liquid before replacing the cap. Pulse at a low wattage once or twice to confirm vapour forms cleanly, then begin below your usual wattage. Raise power in small increments until the vapour is warm enough and the flavour is clear without tasting scorched.
Common RDA Coil Problems and Quick Fixes
A burnt taste usually means the cotton is too tight, not fully primed or the wattage is too high for the build. Rewick first if the cotton is dark or damaged. A gurgling RDA often has too little cotton or too much e-liquid in the well, while leaking can come from over-squonking, over-dripping or cotton that does not adequately cover the juice channels.
If flavour feels muted, adjust coil height before changing everything else. Raising a coil slightly can improve airflow contact on some decks, while lowering it may work better on others. Airflow setting also changes the result: a more restricted draw generally concentrates flavour, while wider airflow produces a cooler, airier vape.
Recheck the post screws after the first tankful or two of e-liquid. Heat cycles can occasionally loosen a connection, particularly with new wire. Keep the deck clean, replace cotton when flavour drops and inspect coils regularly for heavy residue.
Building is a repeatable skill rather than a one-off project. Start simple, use a regulated mod, respect battery limits and make one adjustment at a time. Once your build is stable, a good RDA gives you the freedom to match wire, airflow, cotton and e-liquid to the way you actually vape.